Teaching Your Dog, The “Sit” Command
Teaching your dog to sit when commanded is basic and this is where most dog parents start. It is something that can be learned by our dogs very fast. This increases their confidence and forms the basic block on which more commands can be learned.
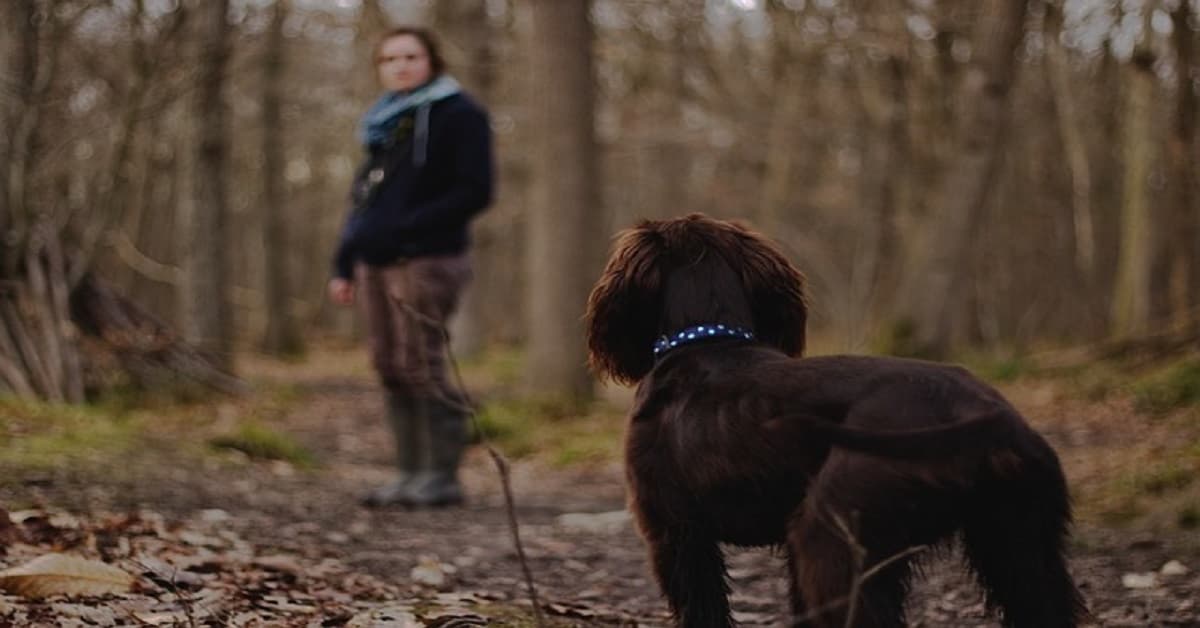
One of the top benefits of the sit command is that it gives you immediate control over your dog no matter how far your dog is from you (as far as he is in the range of your voice).
The good thing about the sit command is that you can teach it to your dog at any time, but it is always advisable to start teaching them early.
Basic Things To Keep in Mind While Training Your Dog To Sit
- Keep training sessions short, ten minutes is ok for a start.
- Try and incorporate the training into part of your dog’s everyday life e.g. Training him to sit before eating, training him to sit by your side, etc. This will help make the training fun and enjoyable for both of you.
- Be clear in communicating to your dog what you want him or her to do.
- Be consistent with the command, repetition is key to the dog’s learning, also be consistent with your reward system.
- Your dog is an animal and does not understand human words easily. Repetition and patience are an important part of the training.
- As your dog gets to obey the command, gradually phase out using treats as a reward. Your dog should be able to obey you without treats now (A little treat here and there later on in not bad, but don’t make it a must).
- Start the training in a familiar environment for your dog, as time goes on and he or she begins to grasp the concept more, go to other environments and practice the commands, also important is increasing the duration of the sit each time you practice.
The Three-Step Guide:
Number 1: Connecting with Your Puppy
This training technique is perfect for a young puppy. Whenever you notice your puppy trying to sit down, just say sit and then praise him when he sits. In the puppies’ mind, you are associating the word sit with the action of actually sitting down.
Because of the stage, the puppy is at, they easily make the connection about what you are trying to do with them.
Repeat this process consistently and very soon, your puppy would be sitting at the mention of the “sit” command. Don’t forget the treats and praises, especially at the beginning stage.
Your puppy would be thinking “wow, all I have to do is sit and I get so many goodies”.
Number 2: Sit Training without Leash
This training is come in handy for older dogs and puppies.
The process is this. You facing your dog and he standing in front of you. Take a treat in your hand, hold the treat over his nose (a few centimeters above his head).
Now you will notice that the dog will try to follow the treat with his nose instinctively. This will force him to sit upright, you should be raising your hand slowly above his nose as he tries to reach the treat (and sit down at the same time).
Immediately you notice he is trying to sit down, say the word sit. As his bottom hits the ground, praise him and give him the treats.
Sometimes things don’t go exactly as planned, you may find out that your dog is the jumping type or backs away, that’s ok, just make sure he doesn’t reach the treat and begin the process all over again.
Repeat the process as many times as you deem necessary until your dog gets the concept.
With time, your dog would soon adhere easily to the “sit” command without much persuasion.
Number 3: Sit Training using the Leash
If the two techniques above do not work for your dog, then you can use the final option which is the collar and leash technique.
You first stand next to your dog both of you facing the same way forward. Hold the leash straight directly on your dogs’ collar, and at the same time press your dog’s back down saying sit at the same time.
As soon as he sits down shower him with praises and whatever reward you think is appropriate here.
Remember, your dog would have resisted other forms of training to get here so your persistence would be required for this technique.
Most dogs that would resist the other techniques are older dogs who have formed a way of life already so being firm and consistent with them in training is important.
In the end, your dog would finally learn the “sit” command and adhere to it when necessary.
Teaching Your Dog, The “Down” Command
As soon as your dog has mastered the sit command, it will be wise to follow it up with the “down” command. This together with the “sit” command provides a more solid foundation for more advanced commands.
The laying down position is a very submissive position for our dogs. In the dog world, whoever they lay down for has complete dominance over them, especially when you stand tall over them here.
Your ability to teach him this command would be a testament to how dominant or highly respected you are in his eye.
In simple terms, the “down” command is very useful when you need your dog to be in a particular place while you attend to something else, like making him stay in the car while you shop or lying down in the park while you get something from your car.
Basic Things to keep in Mind While Teaching The “Down” Command
As with the “sit” command, you need to also make things simple for your dog when teaching him the “down” command. As he catches up, you can up the difficulty level a bit by remembering the basics below.
- Take the training sessions to more public places.
- Gradually increase the time which your dog stays down on command.
- When you feel confident that he has mastered the command. It is time then to add more distractions. You can leave food around him or some of his toys around him after giving him the down command. These temptations are set so that you can gauge how ingrained the command is at this stage.
If your dog resists his urge to go for these things, your job would be complete, but if he breaks form and goes for the things, appropriate reprimand should be applied immediately and training resumed.
Remember, the main thing we want to achieve with the down command is to have your dog lying down on his or her stomach immediately after the command is issued.
The Two-Step Guide
Number 1: Down Command Without Leash
You start by taking some of your dog’s treats. Hold it a few centimeters in front of his nose, as soon as he notices the treat, your dog will make an effort to reach them.
Now as he approaches, move your hand towards the floor. Because of your dog’s physical makeup, he will be forced to lie down on the belly with his legs stretched out in front of him.
When this happens, praise him and offer the treats.
After repeated efforts, your dog would be getting what is expected of him here, now is the time to add the verbal command with the action. We will be using the word “down” (you can use whatever suits you).
Adding the verbal command now builds a connection to the dog’s intellect with the action. Not only will this build a connection to the action for the dog, but it will also replace the other forms of action you started with.
After several more repetitions, your dog should be able to obey the verbal command without much pressure.
As with the other command, as your dog gets it, you start to practice them more in complex situations (practice the command when he is around other dogs or as you go about your daily business).
You can also increase the duration of the command now.
Number 2: Down Training Using the Leash.
- 1. First thing is to place your dog’s collar and leash on him.
- 2. Next, put him in a sitting position and stand or kneel next to him (whichever is more comfortable to you).
- 3.What you want to do now is to gently persuade your dog to sit down, now this depends very much on the dog’s size and co-operation with you.
- 4. Now issue the down command and try to guide his head into the down position with the leash at the same time using your other hand to press down his back into the lying down position. (You may have to lift the dog to put him into the lying down position, just do what you are comfortable with).
Immediately he gets into the position, gives him lots of praises and some treat maybe. Make him know that you are happy with him for following thru.
- Repeat this command a couple of times and then try it again but this time from a standing position. As usual, try the command in more complex environments as your dog improves on it.
The main thing like always is to be consistent with the training and command. When you have reached the stage where your dog obeys the command instinctively, also remember to add some sort of release command like “away”. As you will see, a dog that goes down into a submissive position stays like that till his perceived master releases him.
The “away” command is supposed to achieve this.
Teaching your Dog, the “Come” Command.
The “come” command is a very important command which your dog has to learn, it may not be apparent, but sometimes your dog obeying this command can be the difference between a life and death situation for him.
Also, your dog being able to adhere to this command will give you more confidence to give him or her greater freedom when you are outside the house with them.
The main thing you want here is for your dog to answer instantly when he hears your “come” command, not minding whatever is happening around him at that period.
The reality is that it is hard for most dogs to adhere to this command a hundred percent. You may get seventy or even eighty percent adherence but a full one hundred percent is not possible.
Some dog breeds, especially the ones that are active tend to have a hard time adjusting well to this command. Notwithstanding, a dog that cannot obey the “come” command is a danger to itself. As with all commands, the earlier in their lives they start learning the better for them. Puppies would be far easier to teach than older dogs.
Why Your Dog Doesn’t Obey Your Come Command
Here are some of the reasons why your dog might not obey your come commands
- The simplest reason is that your dog does not yet understand what the “come” command means.
- Your dog has been disobeying you in the past and has been getting away with it without any form of reprimand.
- Depending on your relationship with your dog, he or she might consider that following a scent is more appealing than coming to you at the moment (Simply means you have not established your role as the alpha).
- You might have been unknowingly punishing him for obeying your commands in the past. For most dog parents, this does not seem possible but imagine a scenario where your dog comes to you and the first thing you do is to put him in chains. Automatically, coming to you becomes associated with bondage.
The above are somethings you have to change to successfully teach the “come” command.
Basic Things to Keep in Mind While Teaching the “Come” Command.
- No matter how long it takes your dog to come back, do not punish him. Our dogs even though intelligent do not have the same intellect as we do. Punishing him when he comes back to you only makes him associate the last thing he did to your current action, which means that coming back to you equals punishment.
- You have to make coming to you the most attractive thing that your dog can do. Coming to you should be equal to safety and joy.
- As far as your dog has not learned the “come” command properly, having him on a leash is a must. Your dog has to work himself up to the privilege of moving around with you without a collar and leash.
- Try to make the “come” command part of your dog’s daily activities. For example, you can use it when you want to feed him or just to pet and praise him. Whatever it is, make sure that there is something positive associated with coming to you.
- Don’t run after your dog when teaching the “come” command. Only in extreme cases would you have to go and get him back and even at that don’t punish him yet, especially at the beginning of the training. Just start the training session afresh.
- Make sure when you are beginning your training never to call your dog in a situation that looks bad for him. You don’t want him thinking from the beginning that it is ok not to respond to you sometimes.
- As usual, start easy and progress to more difficult circumstances as your dog learns. Don’t rush the sessions, the more time you spend with your dog the greater the bond.
The Comprehensive Six-Step Guide:
First Step: As you already know, puppies are psychologically attached to the pet parents so much that they want to follow you around anywhere you go. This simple fact can be taken advantage of. Simply make the young puppy know that his or her presence around you is welcome, always reward and make them happy to be around you.
Second Step: The second step is the introduction of the verbal command. This is so that the puppy will associate the word “come” to the action. Start in a place where nothing else is going to take your puppies’ attention and then issue the command “come” (you might need to kneel in the beginning or get down to a comfortable position, the essence being for you and your puppy to be relaxed). If necessary, use a treat to endear the puppy, when he or she comes to you, praise them and reward them accordingly. This act should be repeated many times throughout the day to reinforce the command.
Third Step: At this stage, you can introduce a third party to the training. This can be any of your friends. You stand at one end and your friend stands at another end and you issue the command “come” to your puppy or dog. When he gets to your end praise him lavishly and then your friend will issue the same “come” command, your dog will now run over to your friend who once again will praise him lavishly. Most dogs love this game. As you progress, you can even make it more interesting for your dog by using different rooms in the house.
Fourth Step: By now your dog should have made a lot of progress obeying the “come” command. At this stage, we can take the training out of the house. Go for your usual walk with your dog. Make sure your dog is on the leash, as you are walking with him when it seems his attention is away from you, use the “come” command to bring him back. When he gets to you, praise him and continue your walk.
Fifth Step: The fifth step is just taking the fourth step further. Here instead of using the leash, we will use a lightweight piece of rope. The rope extends further than a leash does. The whole idea of the rope is to give the dog a sense of freedom unlike the leash as his movement is more restricted when on the leash. Now you take the action to a larger space, for example, a park. Let your dog start roaming, when he has gone a little farther than he would normally, issue the “come” command. When he comes to you reward and praise him and let him go. Repeat the process as much as you deem necessary.
Sixth Step: This stage is like an extension of the third step but with a twist. Again, you take the training indoors and you have a friend to help you. You get to play a little game with your dog. Here we introduce a ball in the mix. With you at one end of the room and your friend at the other end, throw the ball to your friend and at the same time issue the “come” command. What you are doing here is allowing your dog to make a decision. Should he go after the ball or should he heed your command? If he comes to you, well done, pat him on the head and praise him lavishly. You can get your friend to throw the ball back to you and play with your dog a bit, before repeating the process. In the case where the dog ignores you first and chases after the ball. Let your friend just hold the ball out of reach and completely ignore your dog. The whole idea is for your dog to start understanding that he can only get what he wants by coming to you. Your dog would likely end up coming back to you, do not punish him a make a fuss, just pat him a bit and start the training process again. Remember, it is supposed to be fun, so just play around with your dog a bit for him to enjoy the process.
As with all the training, make sure you take the stages one at a time, there is no need to rush anything. You can always go back to an easier step and continue if your dog is having difficulty learning.
Teaching Your Dog, the “Stay” Command.
Now the “stay” command is a controversial one, some dog trainers argue that there is not much need for it. Others argue that there is a big need for it. Let’s look at an example, you make your dog understand and fully adhere to the “sit” command, but what you will notice once you move out from that spot is that your dog will follow you.
What happens in a situation where you need your dog to sit still for some time while you handle an emergency.
You need a command to keep your dog on that spot till you come back for him or her and this is where the “stay” command comes into play.
Now, training your dog to adhere to the “stay” command can be really challenging, the command goes against your dog’s natural instinct which is to be by your side everywhere you go.
In the end, when you have managed to teach your dog the “stay” command. You will find it useful in many situations. One of those situations may be to get your dog to stay in a lying position while you welcome some important visitors to your home. Another would be a scenario at home where you want him or her to stay still instead of chasing the other pets in the house.
So now let’s begin, as usual, we start from the simple to the complex. The best time to train for the “stay” command is when your dog is tired (after exercising him or her from a long walk). Keep the training sessions short and have them in quiet, familiar places.
The Three-Step Guide:
First Step: Position Training
First thing is to get your dog into the position you want him to stay in (sitting or lying down). After a few seconds of your dog staying in the position, praise him and reward him with some treats.
You do this to encourage the dog and tell him that he is doing the right thing. As soon as the treats and rewards are disbursed, the session is over.
Start the process over again, increasing the staying time e.g the first time maybe two to three seconds, the second session maybe five to seven seconds, and so on.
If your dog breaks out of the command position, simply start the session all over again, but with no treat or reward for the failed session.
Second Step: Verbalize the Command
Now that you have your dog in position, the next step is to start verbalizing the command. Here you can add some hand motion for emphasis.
Basically, you do everything you did in the first step, but as the dog gets into position, you use the command “stay” and the hand motion to indicate that he should remain in position.
As with the first step, reward each successful session and ignore each failed session. With the success of each session, increase the time of the stay till you can make him stay and release him at will (each praise and reward is an indication to your dog that he or she is being released unless you train them otherwise).
Third Step: Distraction Training
By now your dog would be obeying the “stay” command in its most basic form. What you need to do now for the third step is to add some form of distraction. This is to give your dog the choice to choose between obeying you or following the distraction.
Even though we are trying to distract our dog, we should start out simple, stand in front of your dog and issue the “stay” command, take a step backward, wait a bit, then take another step towards your dog, if he remains in the stay position reward him with praises and treats.
Repeat the process, but gradually increase the wait time.
The next step is to take the training to where other activities are happening; the perfect place is a park with people and other pets.
Repeat the process as usual gradually increasing the time.
Next is to try and integrate it with your daily activity, for example when preparing breakfast or when answering a phone call.
Lastly, you can use it in a game, play hide and seek. Use the “stay” command to keep him at a place, go to another location, and then call him from there. Your dog would look for you and properly find you easily because of your scent. Praise him when he finds you and repeat the process.
The whole idea is to make the process fun for your dog.
Finally, as a rule of thumb, do not let your dog be in the stay position for more than three minutes if he is already in the sit position. If you want him to stay longer, put him in the lying down position first before making him stay. This is more comfortable and humane for our dogs.
Teaching Your Dog The “Heel” Command.
Teaching the “heel” command to your dog is quite different from the other training we have been doing. It requires not only getting the dog’s attention but holding onto it for a while. As it is, the “heel” command is not good when you take long walks with your dog.
Dog Training – The Heel.
Your dog is in a sense acting as if he or she is pinned to one of your legs when in the heel position. He or she will remain in this position until released by you. Teaching your dog this skill is not an easy thing. The training must be done slowly and methodically. Short, sharp, and intense training sessions usually work best for this command.
The simple reason for this is that the “heel” command requires lots and lots of concentration from your dog and a lot of repetition from you.
As usual, start slow and progress from there.
The Comprehensive Six-Step Guide:
Now to start training a dog that will adapt properly as a reliable heel when needed. You can do this with or without a leash. The main idea here is to train your dog so that he or she would want to be by your side instead of using force.
As with all command training, you should start in a calm environment that your dog knows and is at ease in.
First Step: Let your dog stand by you (preferably your left leg) and both of you should be facing the same direction.
Second Step: Now you should have your dog’s treat at hand (not in the hand close to the dog). Next, look directly at your dog and call his name. For example, you can say “Fido” if that is his name, maintain eye contact, and take a step or two forward. If your dog moves with you, that means he is catching on, reward him with the treat and praise him.
Third Step: Immediately the dog swallows the treat, begin the process again, catch his attention and move another step or two further, as far as he remains in the heel position, praise and reward him with another treat.
It is worth noting that by this time your dog would be attentive and very much engrossed in what you are doing, for him treats are coming in left, right, and center and if all he has to do is watch you closely, then why not.
Fourth Step: It’s worth saying that if the dog is not following properly with the steps above, hold on to the treats, simply use the word “no” or any negative word you agree to be used for situations like this (failed commands or bad behavioral acts).
Fifth Step: Continue practicing and slowly increase the duration of time needed to hold on to the heel position.
Sixth Step: When your dog can follow you up to ten steps or more with you following the “heel” command, it’s time to switch things up more. Now you have to add a little complexity to the training.
Introduce the complexity one at a time. This is the only way your dog will succeed in the training. Don’t forget to praise and reward your dog for each step accomplished.
- Change the pace of your walking. E.g. Fast pace ten steps or slow pace ten steps etc.
- Change the location of your training sessions.
- Add some obstacles to the heel position path.
- Practice your training around other people and animals.
- Change the duration of the training.
This heel training process has been very successful for many dog parents. Make sure that your training sessions are fun and as always be patient with your dog.

Hi, I am Charles Nwankwo Editor-in-Chief, Mydoggything.com. Gleaning from Professional Dog Trainers, behaviorist, Registered Veterinarians, and Breeders. We are passionate about making dog care easy for you. My job is to make sure that you get the best-updated dog care information to understand and take care of your dog or dogs.